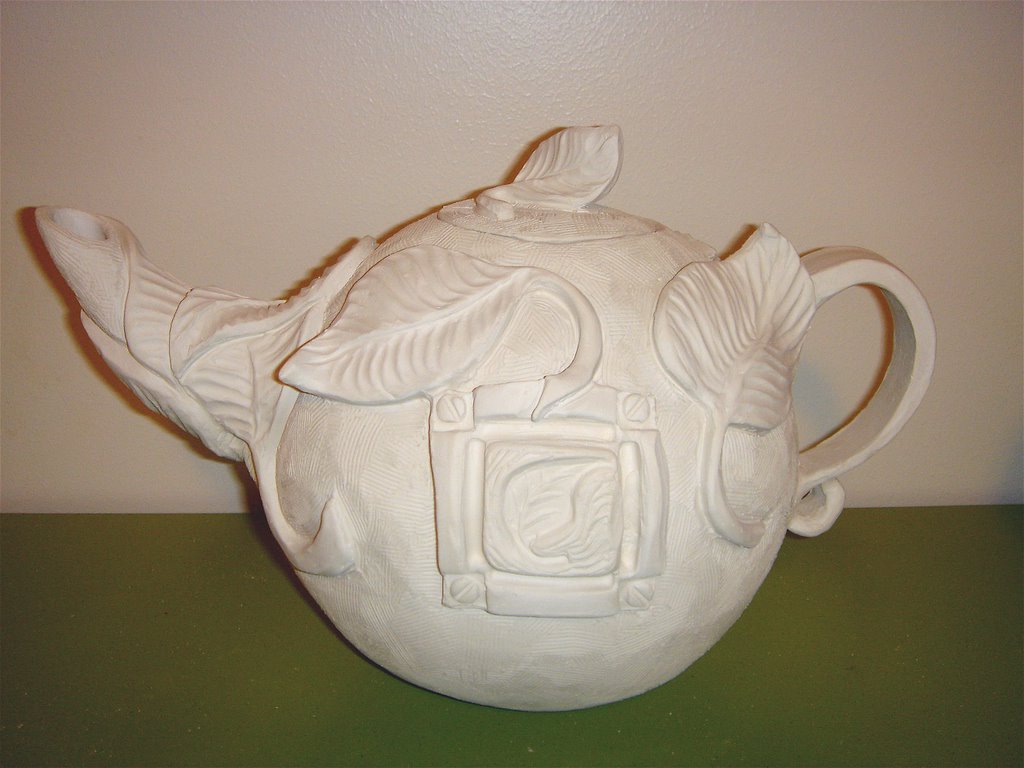
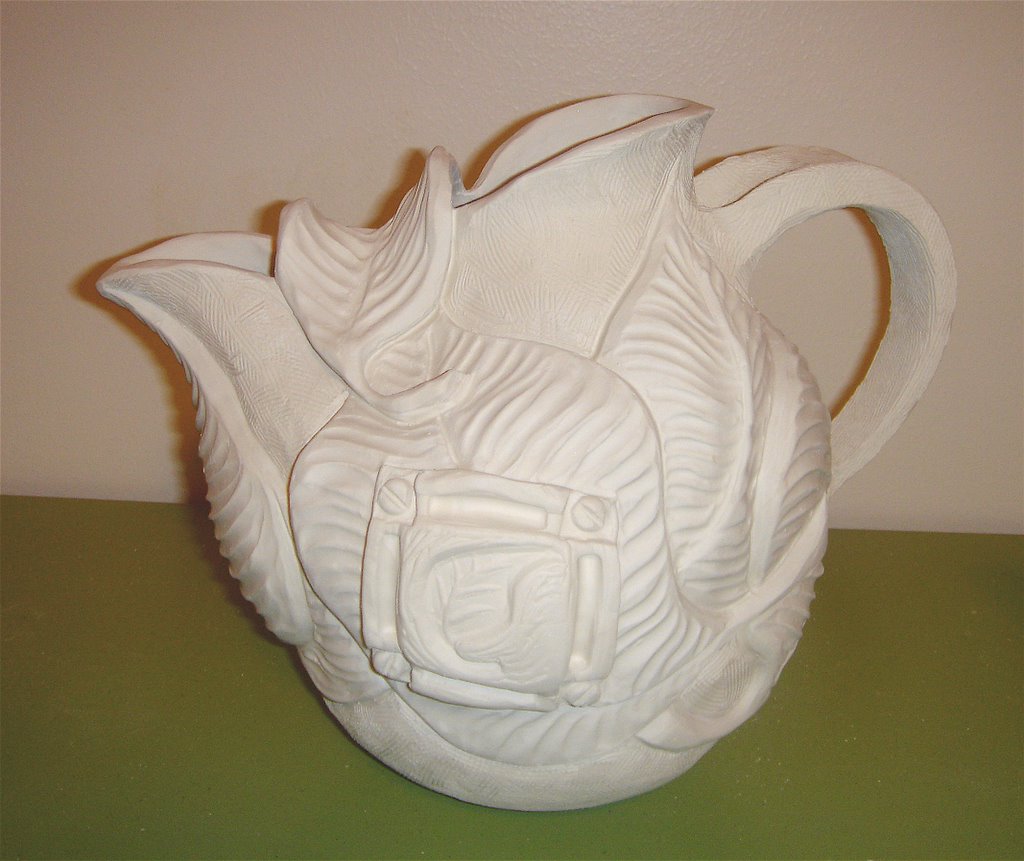
Variations on a Leaf
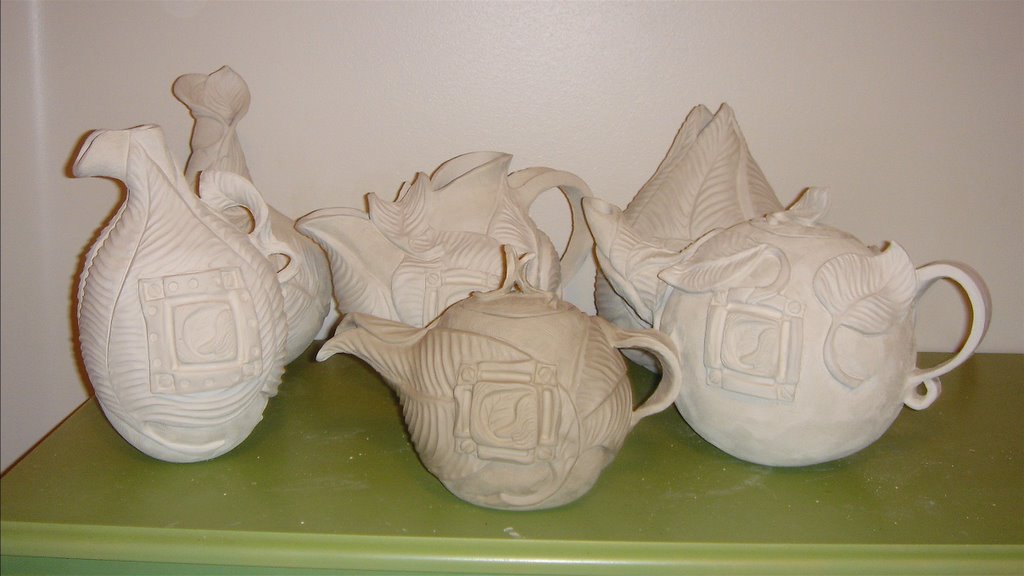
I've been working on a new series of pots centered on the theme of leaves. The pots haven't been bisqued or glazed yet, but here are some examples of my work.


 Unconventional Alternatives to Glazing
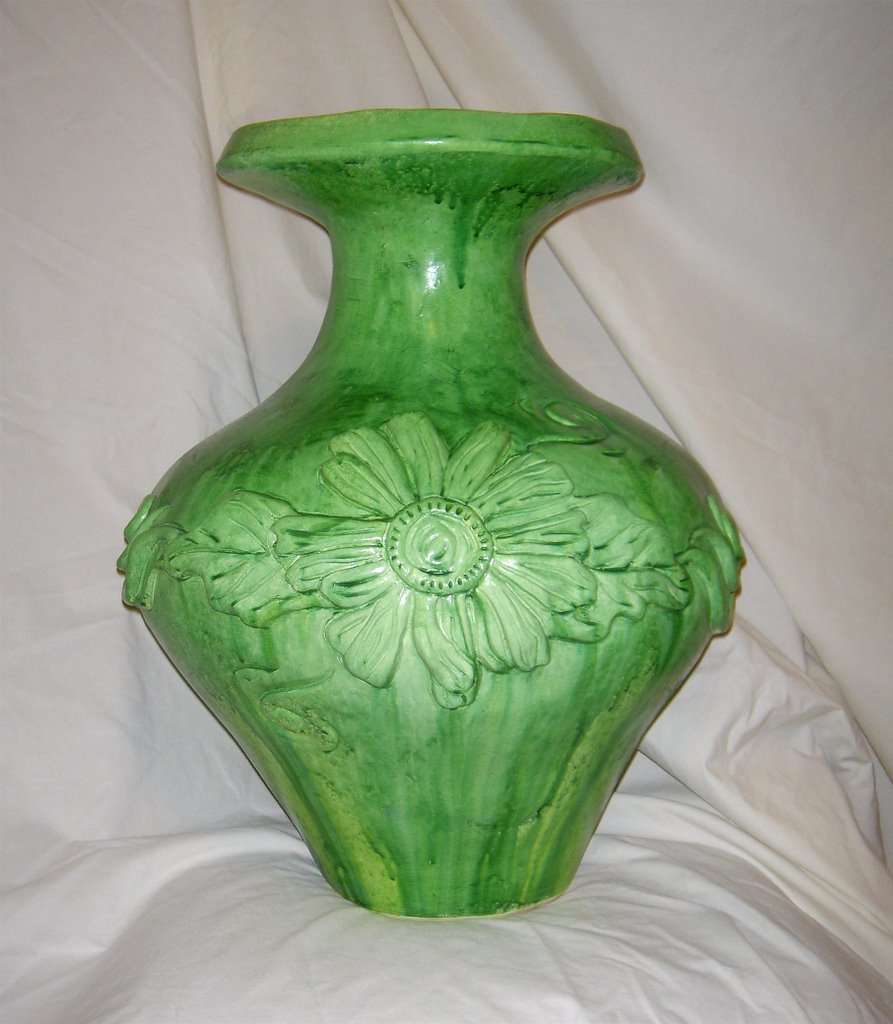 This pot was painted with a basecoat of off-white acrylic paint. It was then sprayed with very thin yellow, and then successively thicker layers of green, only allowing each layer to dry slightly before applying the next, giving the pot a very fluid finish.
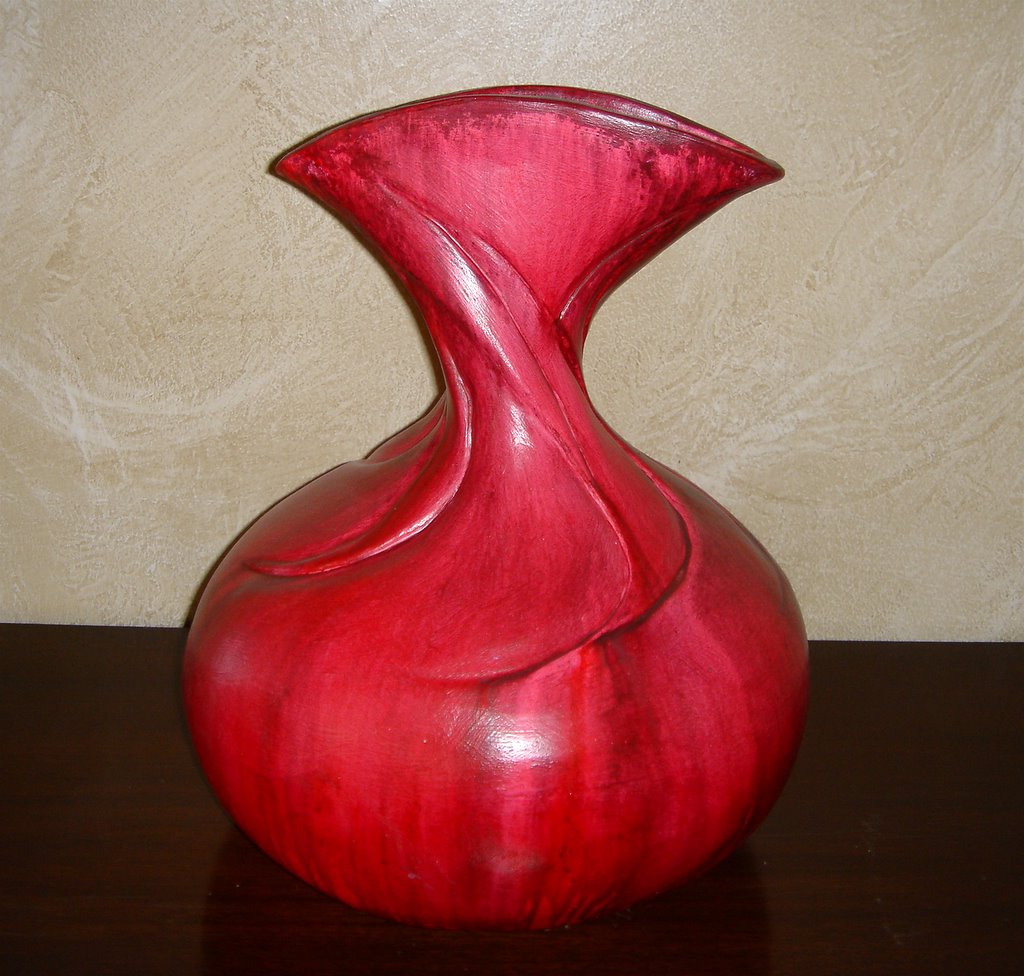 This vase was sprayed and poured with pink and red thinned-down acrylic paint. On top of this was sprayed a thin layer of black with a little red mixed in. After the black partially dried, the whole pot was sprayed with pure water. The water caused the interesting texture at the top and the fluidity at the bottom. After everything dried, the whole pot was sprayed with a thinned-down shiny varnish.
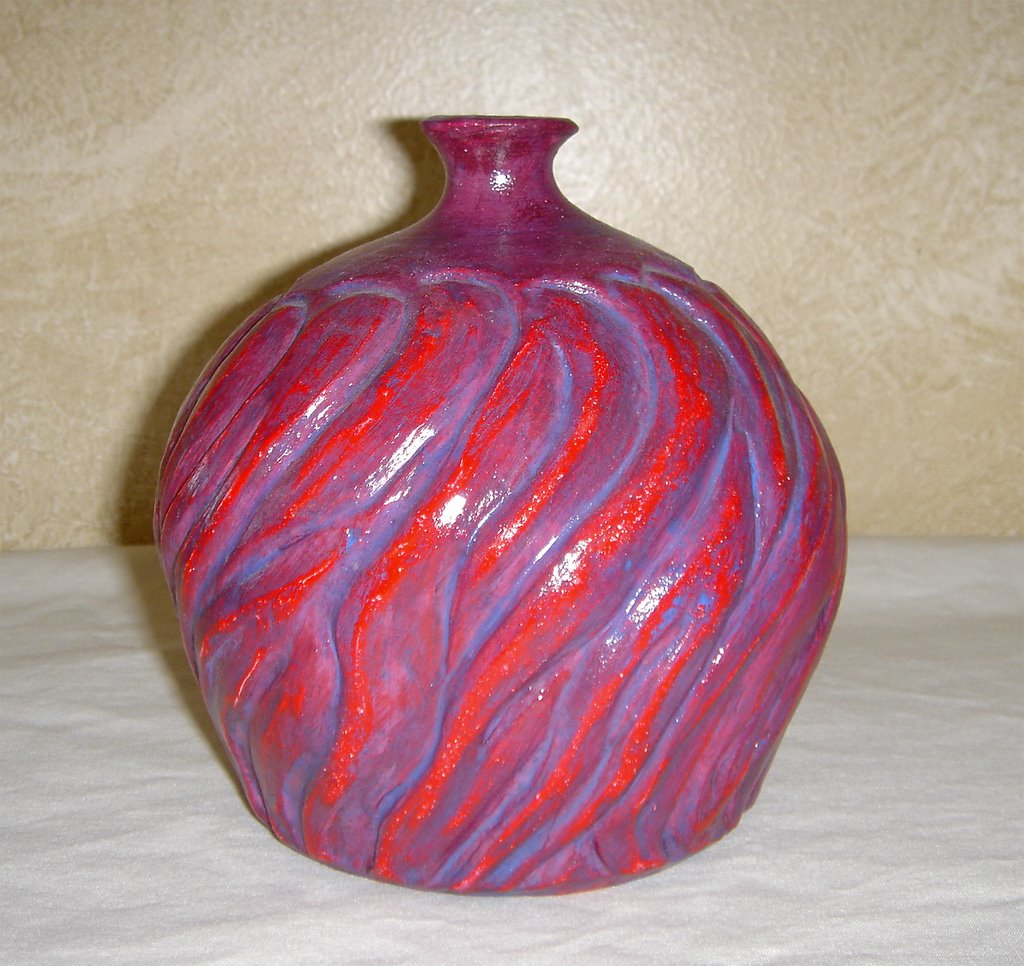 The finish on this bottle was created with acrylic paint. First, a layer of solid red was applied. After this dried, a wash of purple was added, allowed to dry a little, and then rubbed off with a paper towel. A very watered down layer of blue was added to the cracks and also partially rubbed off. The whole thing was then coated with a clear sealant.
 This pitcher was sponged and brushed with blue and blue-green watercolor. After the watercolor dried, it was coated with a clear varnish, which was also allowed to dry. A black acrylic was applied on top of the varnish. After the black dried, a last coat of clear varnish was added.
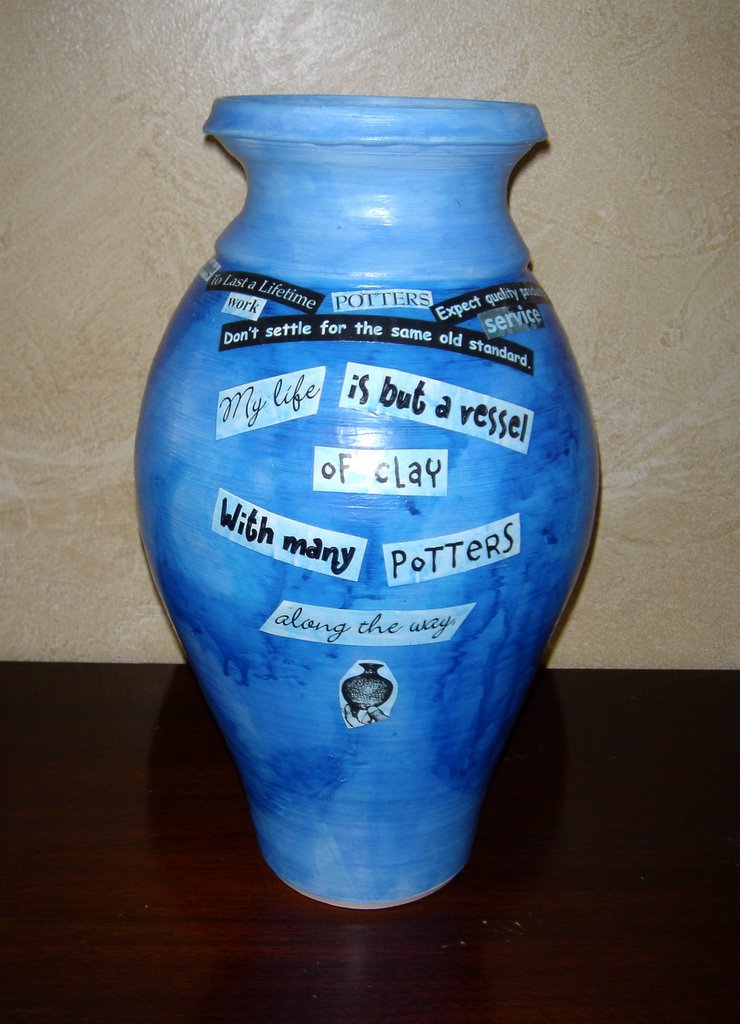 This vase was covered in thin, blue, watercolor and then sealed with Mod Podge. Thicker blue watercolor was painted on in swirls and blown on to bleed out the color. Cutouts from magazines and some printed text were Mod Podged on to the pot collage style. The whole pot was given another coating of thin blue and topped off with Mod Podge.
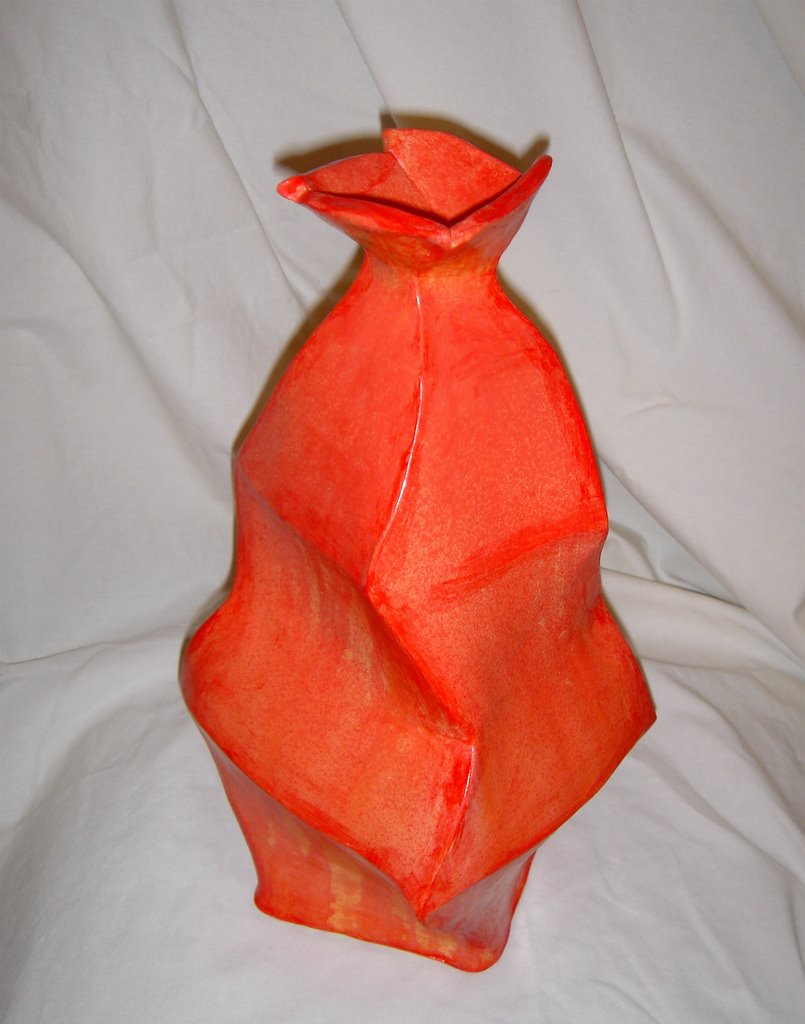 This vase was base-coated with an off-white acrylic. It was alternately sprayed and poured with yellow, orange, and red acrylic washes. The edges all received a coat of thick red acrylic that was partially wiped off. The whole pot was coated with a clear satin varnish.
 This vase was base-coated with a cream colored acrylic. It was sprayed very unevenly with oranges and reds at the top of the form to allow dripping at the bottom. Before the paint completely dried, the top was washed off partially under the sink with a sponge, allowing the carved texture to show. When dry, the whole form received a coat of semi-gloss varnish.