Glaze can literally make or break a pot. One of my ceramic teachers used to say that when a kiln gets opened, it’s either Christmas or Halloween. Because my kiln wouldn’t fire to glaze temperatures when I started my series, I was not able to even attempt glazing my works for a long time (see “What was wrong with my kiln”). I made a lot of bisque ware. With each pot, I improved my carving and texturing technique. I liked what the bisque ware looked like, but didn’t really know how to finish them off. I had a few basic ideas of what I wanted my glaze to look like. It should bring out the texture and carving on the pieces, incorporate a strong shade of green, and look old, like a worn down stain.
I had seen red iron oxide work well alone as a glaze. I wanted to get that same effect, only in green. I bought a ½ pound of Florentine Green Mason stain and ½ pound of Grass Green.
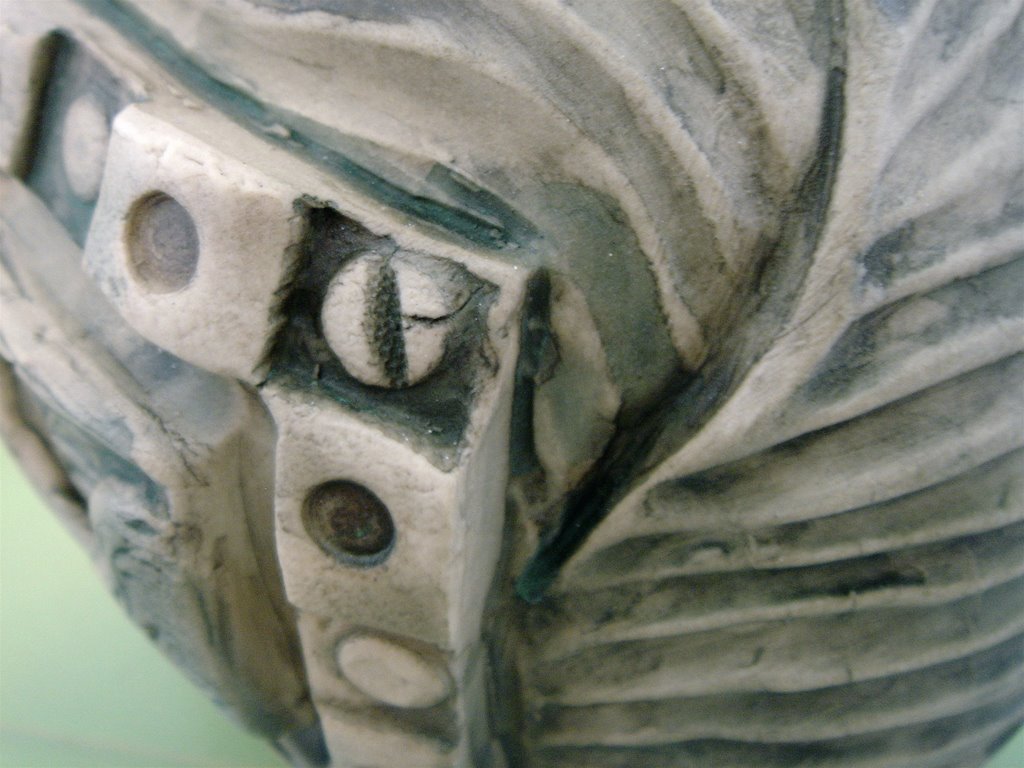
In my first attempt at glazing, I tried a watered down wash of Grass Green (straight up, no glaze added) with an even more watered down wash of Florentine. At cone 10, the Grass Green burnt out to light brown and the Florentine looked gray or a pale dark green. The two pots that I tried this out on were not very pretty. Below is a detail picture of one of the pots and a close-up of a test tile in the same load.

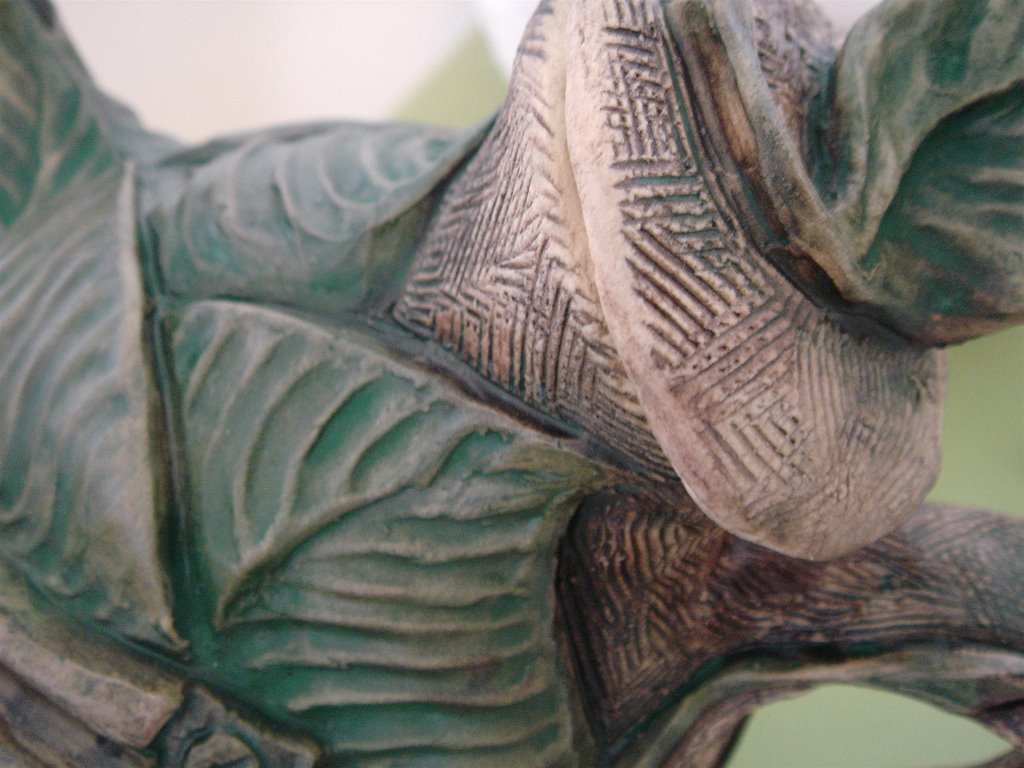
For my second try, I decided that the background needed some kind of contrast to make the pots more interesting. Also, the green needed to be--well, more green. I used red iron oxide in a wash on the background areas and a lot thicker wash of just Florentine on the leaves. When I opened up this glaze batch, I realized why the makers of mason stain advise using some sort of glaze or slip to attach their product to clay. The pots looked really dusty, as though they had been covered with chalk without a fixative (which I guess is pretty near to what happened). When I grabbed one to pull it out of the kiln, I realized that the finish didn’t just look dusty. I had green powder all over my hands. In an effort to salvage at least some of these pieces, I rinsed off most of the excess stain and then brushed a satin clear varnish over the whole pot. The effect was actually pretty good and is pictured below. Knowing I had something to fall back on if further attempts failed, I kept looking for better alternatives.
I went on the Internet and found a couple of cone 8-10 clear satin or matt glazes to try out at www.ceramicstoday.com. I ran a series of tests on these glazes with the colorants in hopes that at least one combination would work. I tested each glaze two different ways: (1) with a little glaze mixed into the colorant thinned with water, and (2) with the glaze brushed in a thin wash over the top of the bare colorant. I was looking for an aged, stained look, and so didn’t use very much glaze in the hopes that it would act as a fixative without being too glossy or overpowering. One of the combinations turned out pretty well. It was nearly what I was looking for, although the green could have been brighter still. The best results seemed to come from a thin wash of glaze over bare colorants.
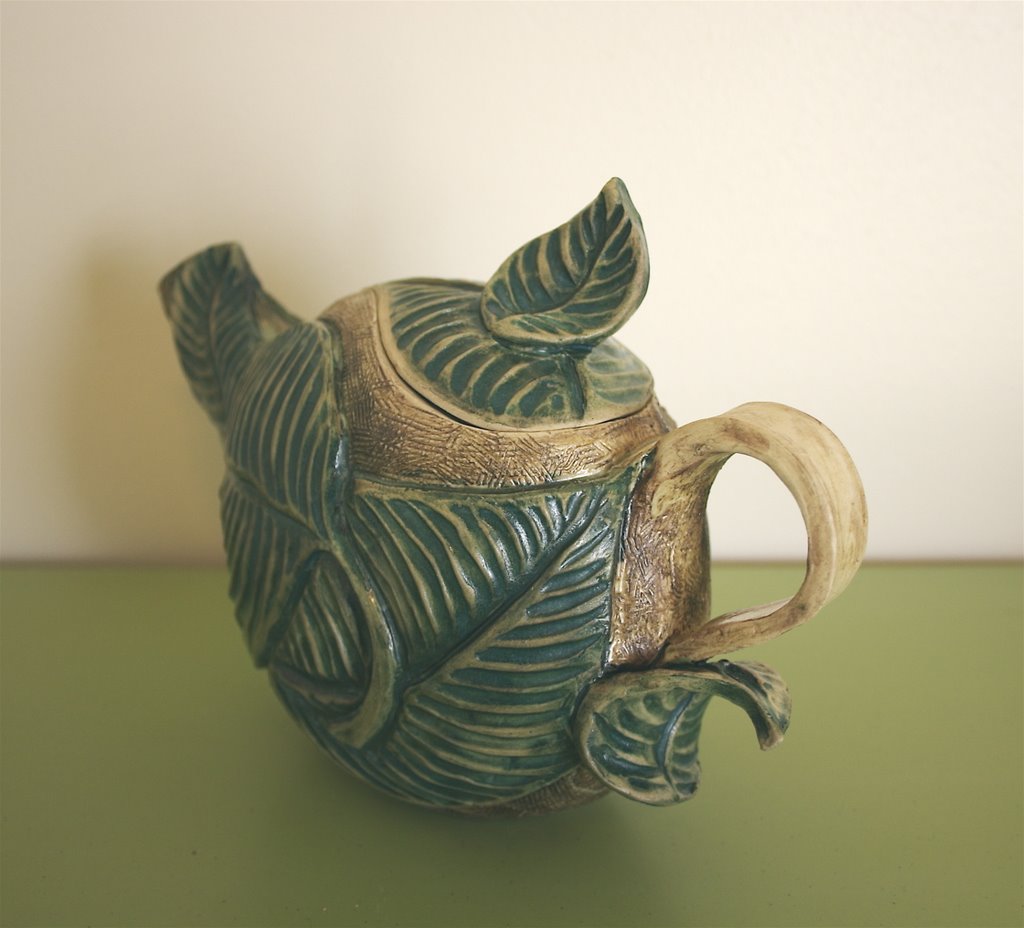
Choosing some less-favorite pieces, I tested out this new combination. They turned out all right, but the green still needed more of a pop. After thinking things over for a day or so, I decided to tweak things a little. I would still use red iron oxide with no additives, but instead of using straight Florentine, I would add a little bit of glaze. After applying the oxide and the stain/glaze, I would brush the entire thing with a thin wash of clear glaze. I bravely applied this combination to four of my pots, and surrendered them to the caprice of the kiln. Twelve hours later, the kiln was opened. I was very excited by what I saw. Florentine Green came out a dark, clear green with no sign of dustiness. The brown of the red iron oxide contrasted well with the green. The wash of gaze gave the pieces a light overall sheen that unified the two colors. Below is detail from and a picture of a teapot from that first successful batch.

With this success, I finally feel able to glaze the rest of the bisque ware from the past few months sitting in my garage. Wish me luck!