Wednesday, January 25, 2006

Variations on a Leaf
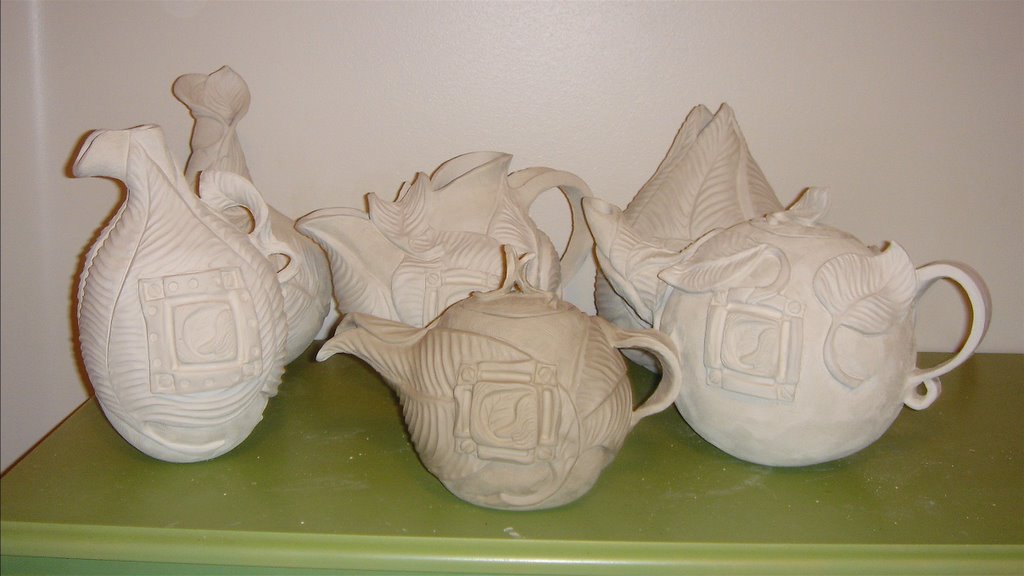


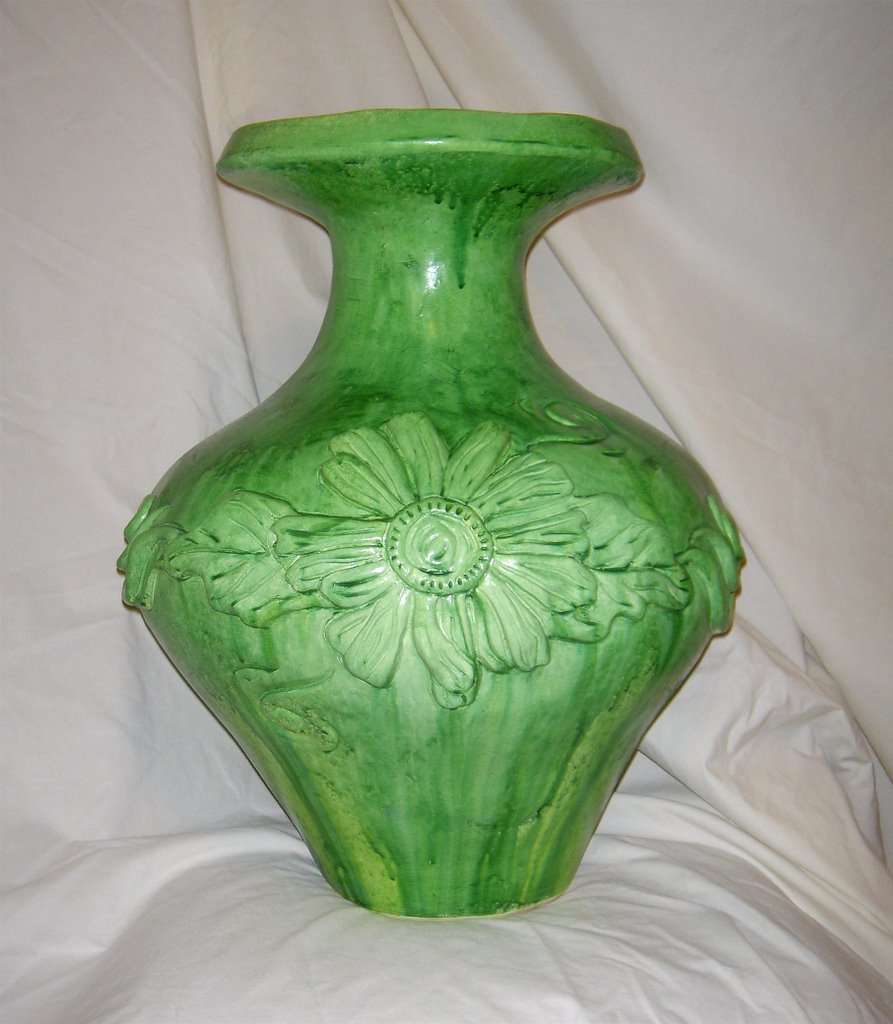
I've been working on a new series of pots centered on the theme of leaves. The pots haven't been bisqued or glazed yet, but here are some examples of my work.

Friday, January 06, 2006

Unconventional Alternatives to Glazing

Traditionally, ceramic ware is finished in the flames. Whether decorated with smoke, slip, terra sigilata, oxides, or glaze, the final step in a pot is surrender to the fire. A potter offers his or her individual oblations to the fire god, fate, luck, or what have you, and places the pot in the kiln. Hours later, the pot re-emerges--beautiful, horrid, or something in between.

Potters have come to prize this co-creation with fire. The spontaneity and combination of pleasure and pain is akin to the relationship between lovers. Through time and struggle, a potter may come to know the firing and adjust to its individual quirks much as a lover will grow to better understand his mate. Yet, there is always an element of surprise. For better or worse, the flame will leave its individual mark on the pot.

To forego this passage by fire and simply apply paint to the surface of the pot may seem to some to be a form of sacrilege. However, in recent years, alternatives to glazing have become somewhat more accepted. In the January 2006 issue of Ceramics Monthly the "Monthly Methods" article is entitled, "Chadbourne's Color: Paint, Glaze. Indoor, Outdoor." (Pg. 63). Although his outdoor work is glazed to outlast the elements, Chadbourne's indoor pieces are painted. The article outlines his process of painting with acrylics, sanding, and staining with acrylic washes.

While the vast majority of my work is still glazed, smoked, or raku'd, I enjoy the added possibility and challenge of finishing works with paint. It has the advantage of being more controllable while still allowing for an organic look. One is not limited to the earthier palette of high-fire glazes. The sky is the limit for coloring and color combinations. The finished look tends to be thinner and less "substantial" than glaze. Below are some examples of various methods of using paint. Each form has a description of what paints and steps were used.


This pot was painted with a basecoat of off-white acrylic paint. It was then sprayed with very thin yellow, and then successively thicker layers of green, only allowing each layer to dry slightly before applying the next, giving the pot a very fluid finish.
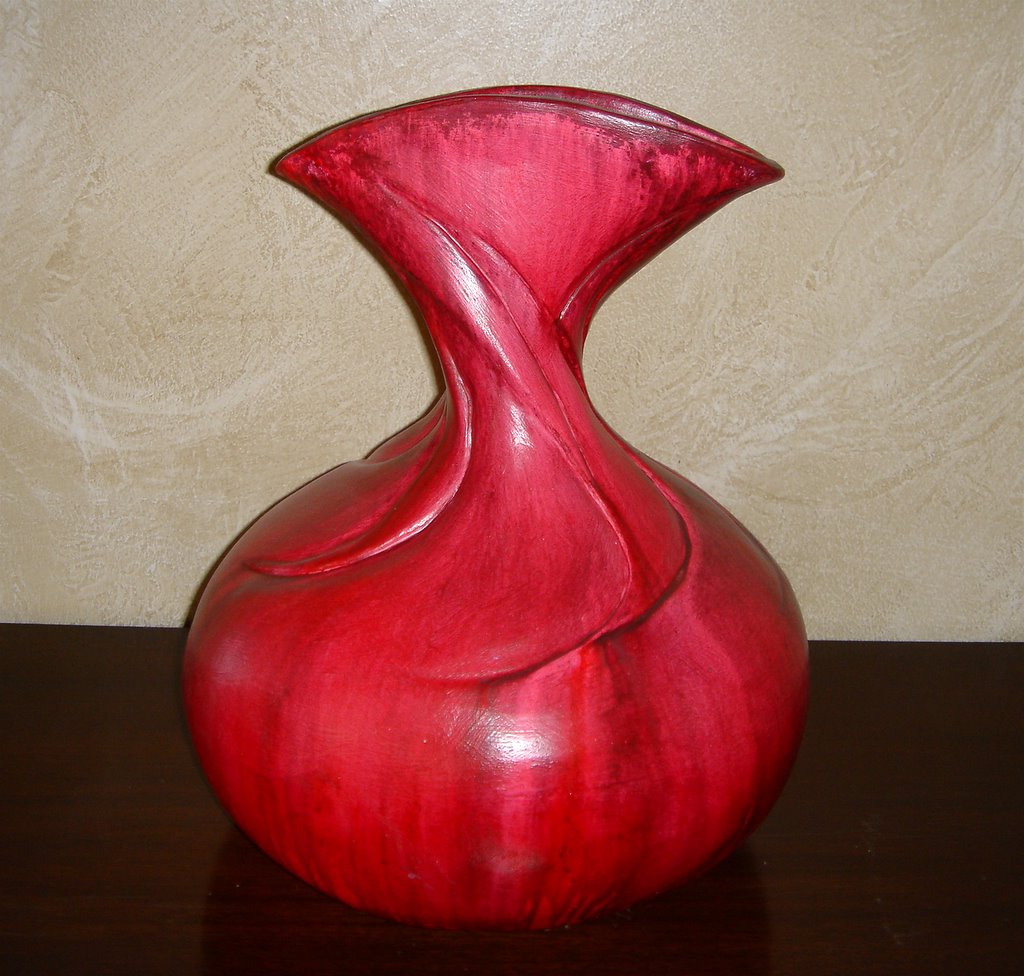

This vase was sprayed and poured with pink and red thinned-down acrylic paint. On top of this was sprayed a thin layer of black with a little red mixed in. After the black partially dried, the whole pot was sprayed with pure water. The water caused the interesting texture at the top and the fluidity at the bottom. After everything dried, the whole pot was sprayed with a thinned-down shiny varnish.
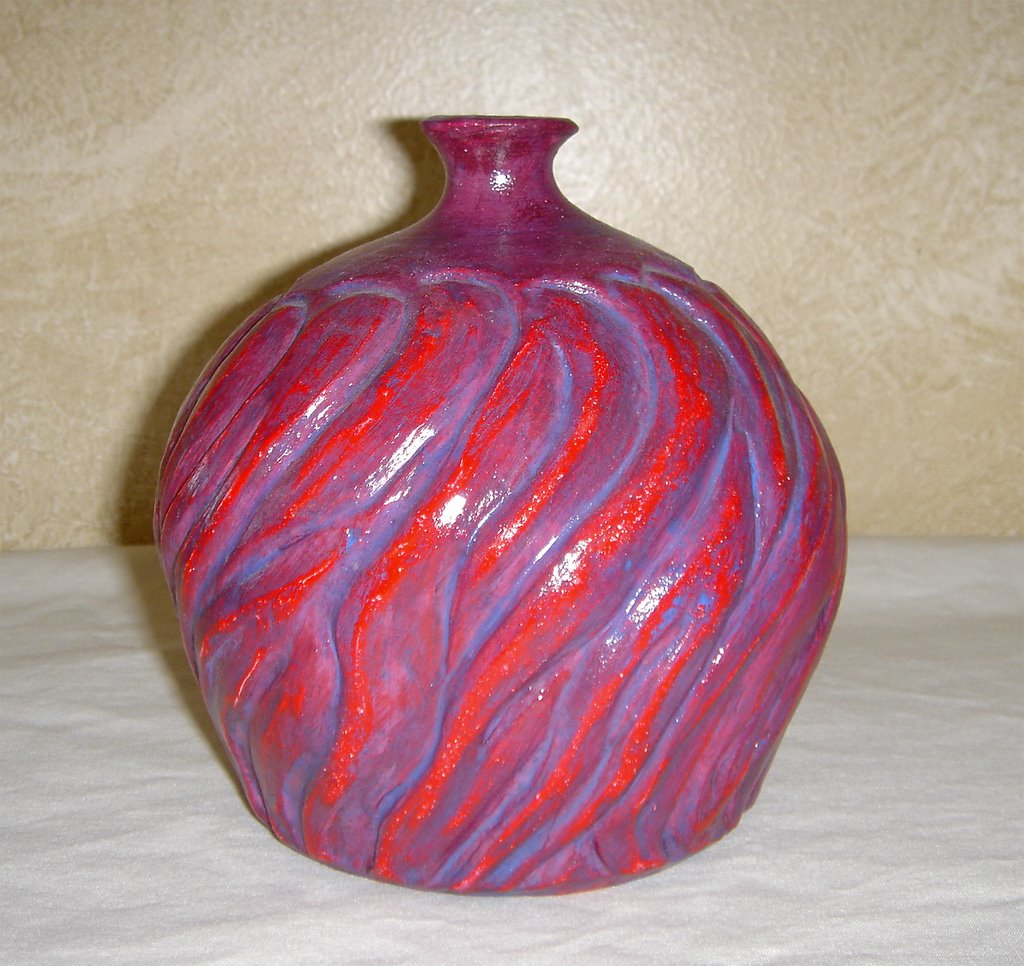

The finish on this bottle was created with acrylic paint. First, a layer of solid red was applied. After this dried, a wash of purple was added, allowed to dry a little, and then rubbed off with a paper towel. A very watered down layer of blue was added to the cracks and also partially rubbed off. The whole thing was then coated with a clear sealant.


This pitcher was sponged and brushed with blue and blue-green watercolor. After the watercolor dried, it was coated with a clear varnish, which was also allowed to dry. A black acrylic was applied on top of the varnish. After the black dried, a last coat of clear varnish was added.
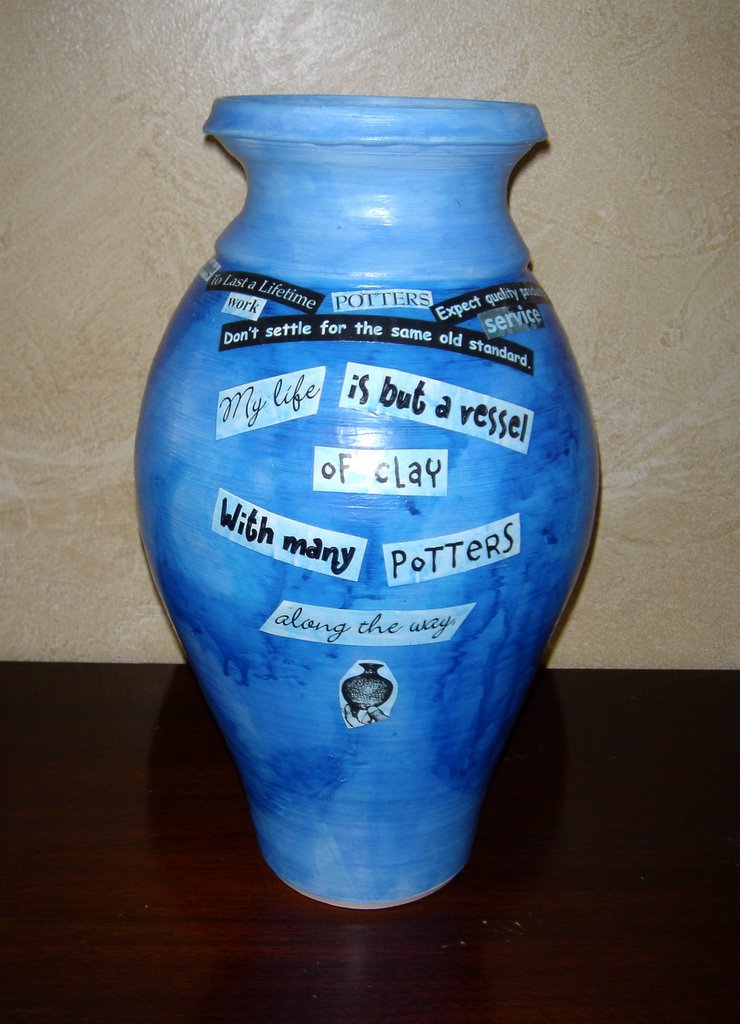

This vase was covered in thin, blue, watercolor and then sealed with Mod Podge. Thicker blue watercolor was painted on in swirls and blown on to bleed out the color. Cutouts from magazines and some printed text were Mod Podged on to the pot collage style. The whole pot was given another coating of thin blue and topped off with Mod Podge.
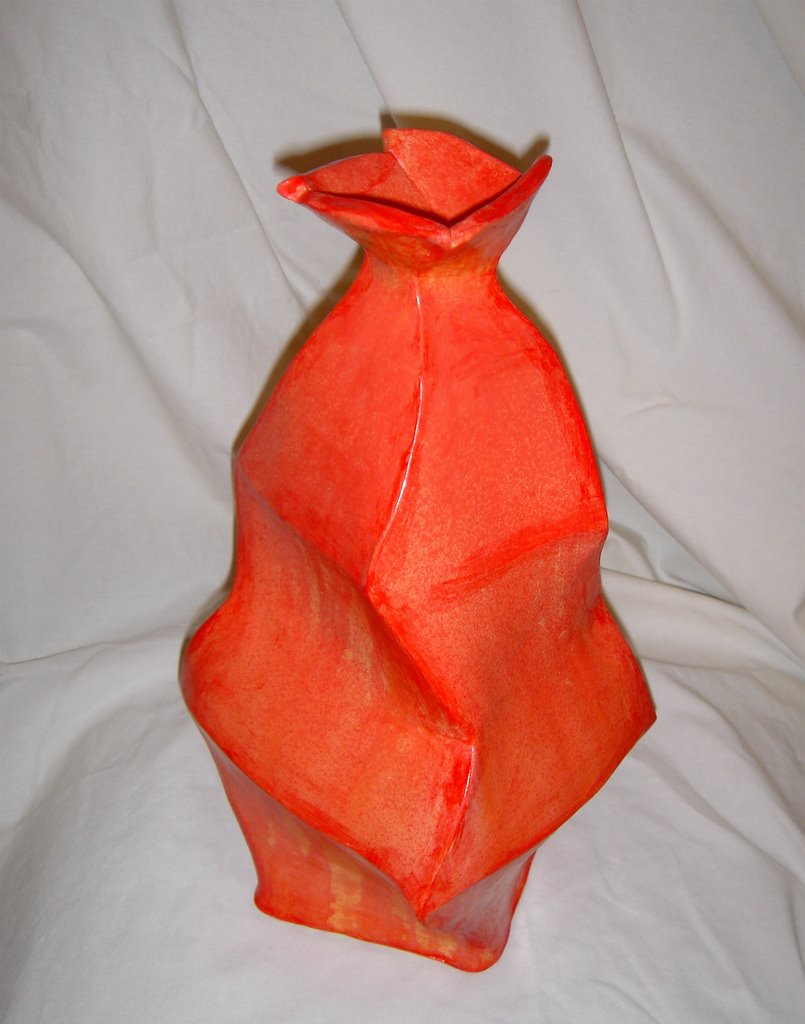

This vase was base-coated with an off-white acrylic. It was alternately sprayed and poured with yellow, orange, and red acrylic washes. The edges all received a coat of thick red acrylic that was partially wiped off. The whole pot was coated with a clear satin varnish.


This vase was base-coated with a cream colored acrylic. It was sprayed very unevenly with oranges and reds at the top of the form to allow dripping at the bottom. Before the paint completely dried, the top was washed off partially under the sink with a sponge, allowing the carved texture to show. When dry, the whole form received a coat of semi-gloss varnish.
Monday, January 02, 2006

Christmas Cookies and Holiday Hearts

Ceramic Christmas Tree Ornaments


There are many very artistic, challenging, and intelligent ways to use clay to make meaningful holiday ornaments. This is not one of them.

My husband and I didn't have very many ornaments to begin with--a couple of small, hanging picture frames, a "First-Christmas-as-a-couple" trinket from my parents, and some ribbon and bows. For our first Christmas in our new home last year, we "upgraded" to a full size Christmas tree. In making the switch to a larger tree, quantity in ornaments was valued over quality. So these cookie-cutter (literally) Christmas ornaments are not for the artist searching for deep expression and meaning; they are for the monetarily challenged ceramic artist who does not wish to settle for plastic balls.

These ornaments require very little supplies and not much time commitment in the early stages. The entire project can be explained in four steps: Roll out slabs of clay. Cut desired shapes from the slabs. Bisque fire. Paint and decorate as desired. Not much to it. It's so easy that I've actually done something similar with a first grade class. Where this project becomes interesting and fun for me is in painting and decorating. I have my own process that I like to do, but really the possibilities are endless.


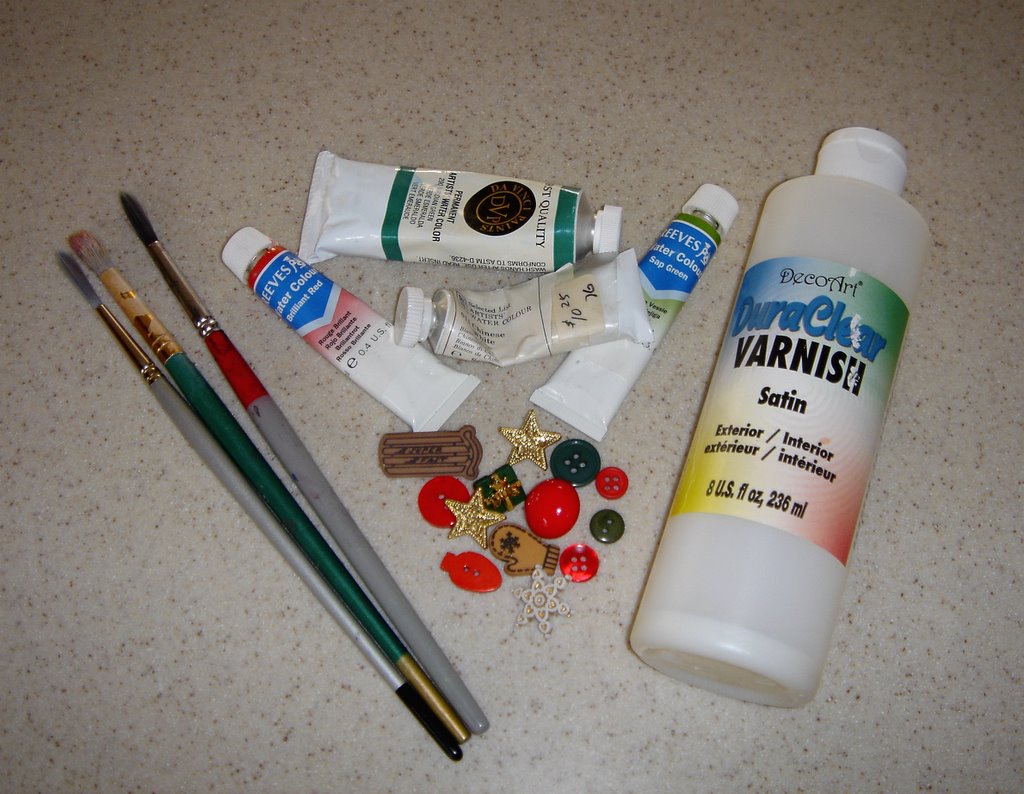
Above are some possible decoration supplies: paintbrushes, various watercolor paints, holiday buttons, and clear varnish.


Watercolor paints create interesting effects on bisqued clay. Because the clay is so starved for moisture, it will suck up the water in the paint very quickly. This makes the application always thicker at the beginning of a paintbrush stroke. I like to use the thick/thin effect of the paint as a part of my design.


After a first coat of paint, the ornaments get a coating of clear satin varnish. This seals the first layer of colors so they won't mix with further layers. Once the varnish dries, I add a wash of black paint. After allowing the black wash to dry only partially, I blot it with a paper towel giving the ornament an aged look. Depending on how creative I get, and how many layers I paint, finishing the ornaments can honestly take forever. I tend to get carried away. Over a year later, I still have unpainted ornaments that I pull every once and while to work on.

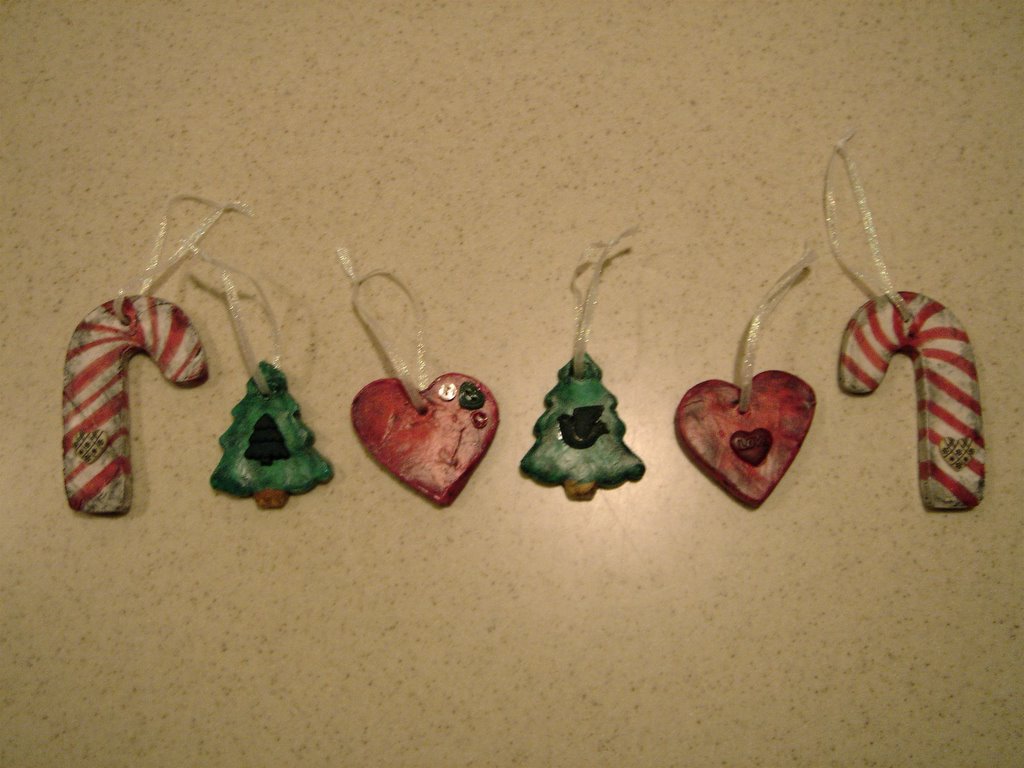
With a stroke of luck, when I was at the craft store buying ribbon to hang the ornaments on, I happened to see a bag of assorted holiday buttons. I bought them, took them home, and glued them on my ornaments. Voila!--finished holiday decorations.

My husband and I treasure being able to put things on our Christmas tree that are uniquely ours. Though our ornaments may not be the most artistic, they are meaningful to us because they are so personal. Each one represents time and talent given to make our house a home. I look forward to making another batch with my daughter. I just have to wait until she's old enough to hold a paintbrush.

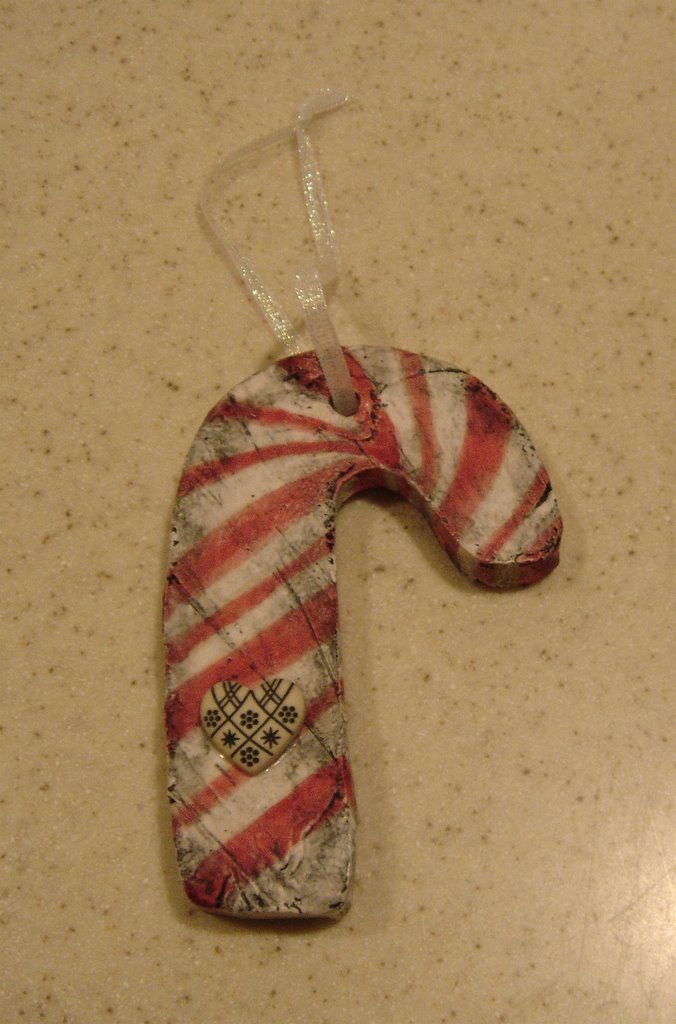
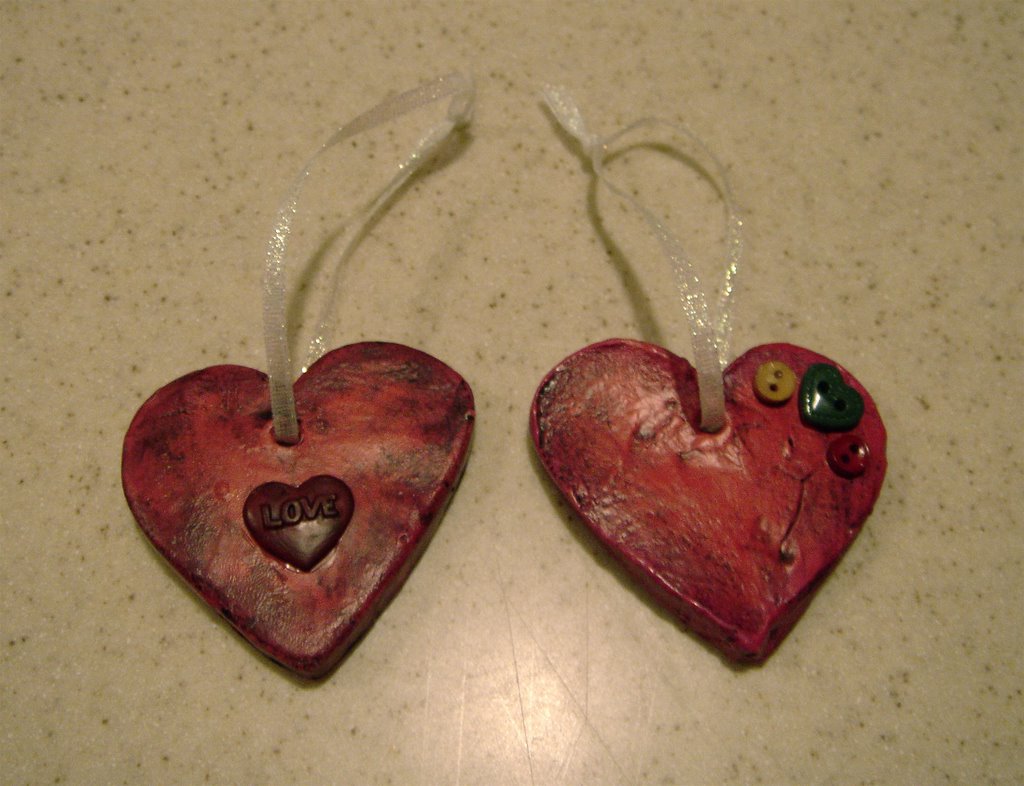
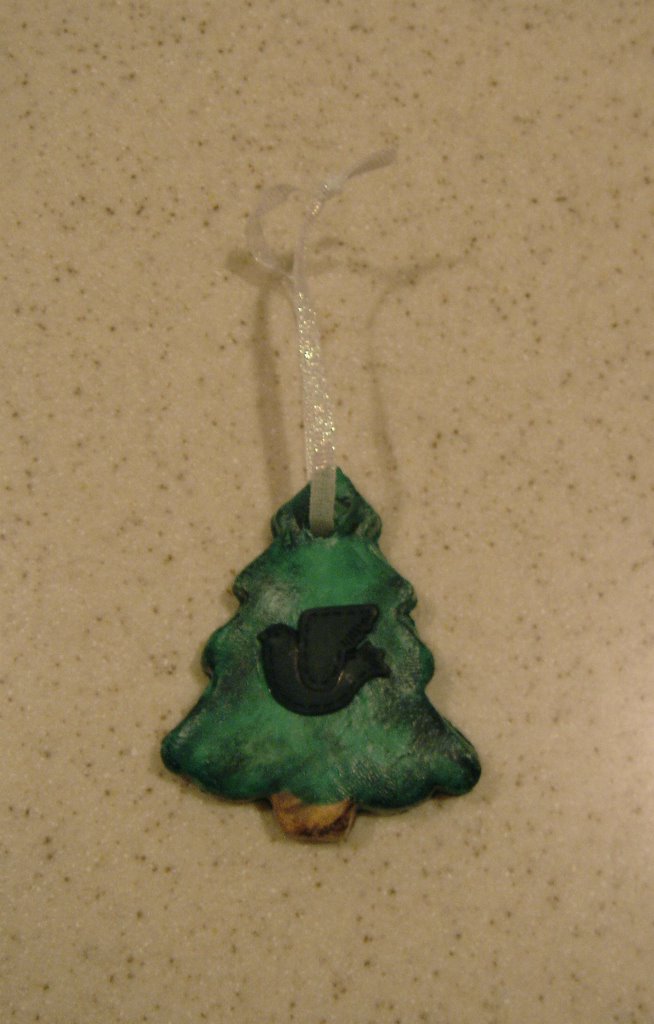
Below are some examples of finished ornaments.


Merry Christmas, Happy Holidays, and the very best wishes for this brand New Year from my family to yours!

Tuesday, December 20, 2005


Creating Indoor Fountains


Over the last month, I have been experimenting with making indoor fountains from handbuilt components.

The idea to try fountain-making in the first place came from a picture that I saw of an amazing teapot fountain by Gary Merkel, simply entitled "Tea Pot". The fountain was displayed in
The Ceramic Spectrum, by Robin Hopper on page 45.
Some more of Gary Merkel's work can be seen at
A Show of Hands Gallery

To help me get started, I bought an informational book on indoor fountains called Create Your Own Tabletop Fountains by Paris Mannion. The book had the information that I needed to get started, but there was more feel-good mystic material than I felt necessary (i.e.: how an indoor fountain will increase the positive chi in your home). However, I would still highly recommend getting this book, or any other reference to those who are entirely new to fountain-making. I had no idea what kind of pumps, tubing, and glue to even look for. The book was a place to springboard off of.

After having made these fountains, there were a lot of things that I would have done differently in the development stage but did not find out until I was trying to assemble the finished product. Instead of a how-to format for this article, I have decided to take a much less formal “What worked—and what didn’t” approach. I hope this proves useful to others trying to create their own ceramic fountains.


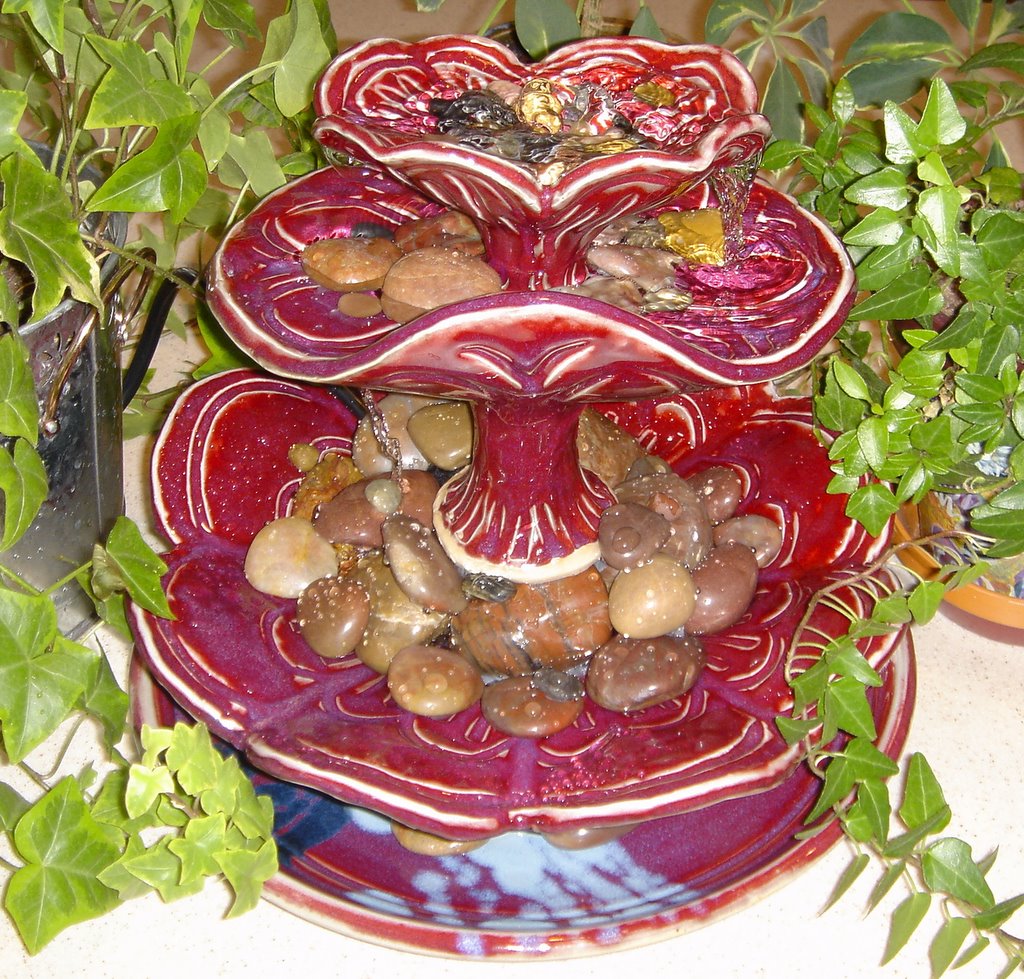
Three Bowl Fountain


What worked?

• The top bowl had the perfect spout shapes on the sides from which to pour into the other bowls.
• Placing a long foot on the bottom of the bowls, rather than trying to come up from the bottom of the next lower bowl proved useful for glazing purposes.
• The straight up-and-down design with the continuous line from feet to bowl provided easy placement of the tubing for least exposure.

What didn’t
• I didn’t think hard enough about where the pump would be going—hence the huge pile of rocks in the bottom bowl to cover it up. I’m not sure that the river rocks completely match the style, carving, and coloring of the bowls. Next time, I would have either made the foot of the bowl above large enough to accommodate the pump, or made and glazed smaller stylized pieces of clay to replace the river rocks.
• The middle bowl does not have any clear channel for the water in which to run, so it tends to pour and splatter from everywhere. Next time, I would try to design it with definite spouts on the edges.
• I would have liked the bottom bowl to be larger. This would give more space to hold water in the bottom, and might look a little more balanced. In order to give the fountain enough water to supply all of the bowls, more water must be added as soon as it is turned on and the original water is sucked up the tube.


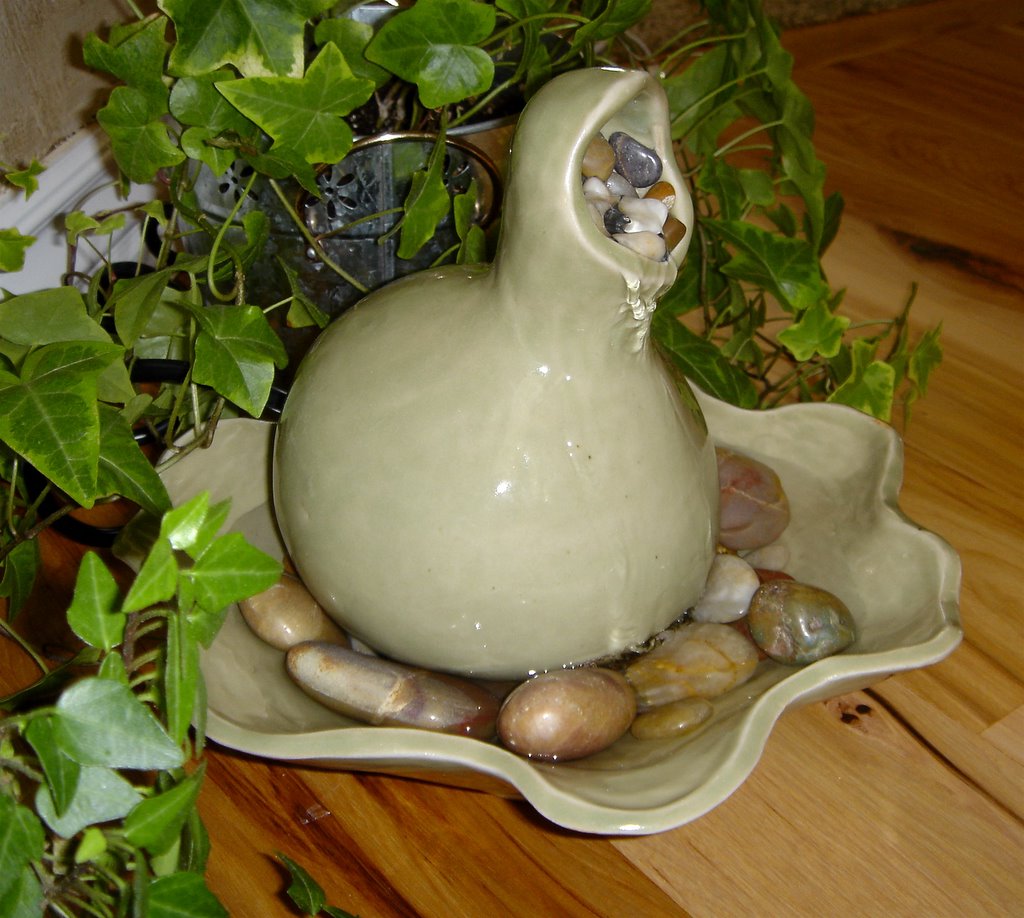
Gourd Fountain


What worked?
• The simplistic design and minimal components of this fountain made it much easier to put together and much less fuss to work with.
• The glaze coloring (a green celadon) and the rounded form work well with the smooth river rocks.
• When I created the top component, I left a large hole in the bottom. This hole allows quick and easy access to the pump and the tubing. The form just sits slightly on top of the pump itself, supported by the river rocks.

What didn’t
• The hole around the top of the gourd was very difficult to position with rocks in such a way that they didn’t fall down the tubing, or simply through the form. I finally worked through this problem by gluing some larger rocks around the tube, and then gluing smaller ones on top of it. It was especially difficult to make the rocks work because I couldn’t immediately test how they affected the flow without destroying my glue job.
• The thick black cord seems disproportionate with the rest of the fountain. In the future, I would look around more to find a pump with a two-prong cord instead of this massive three-prong one.

Sunday, December 11, 2005


Flat Bisque Stamps


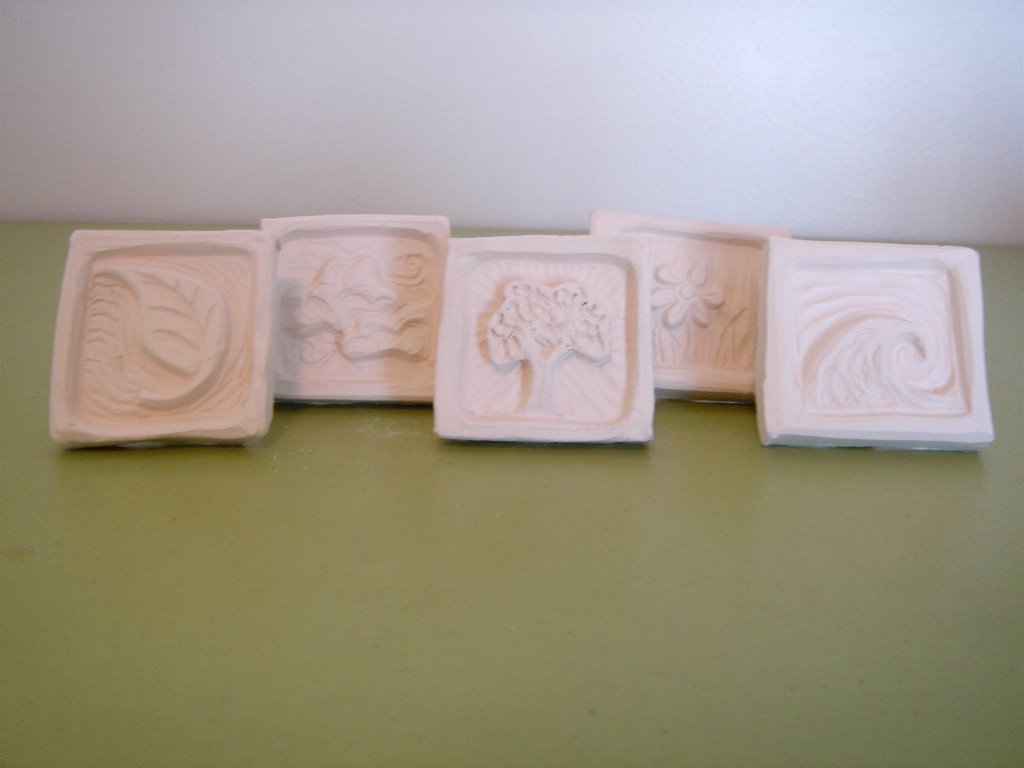
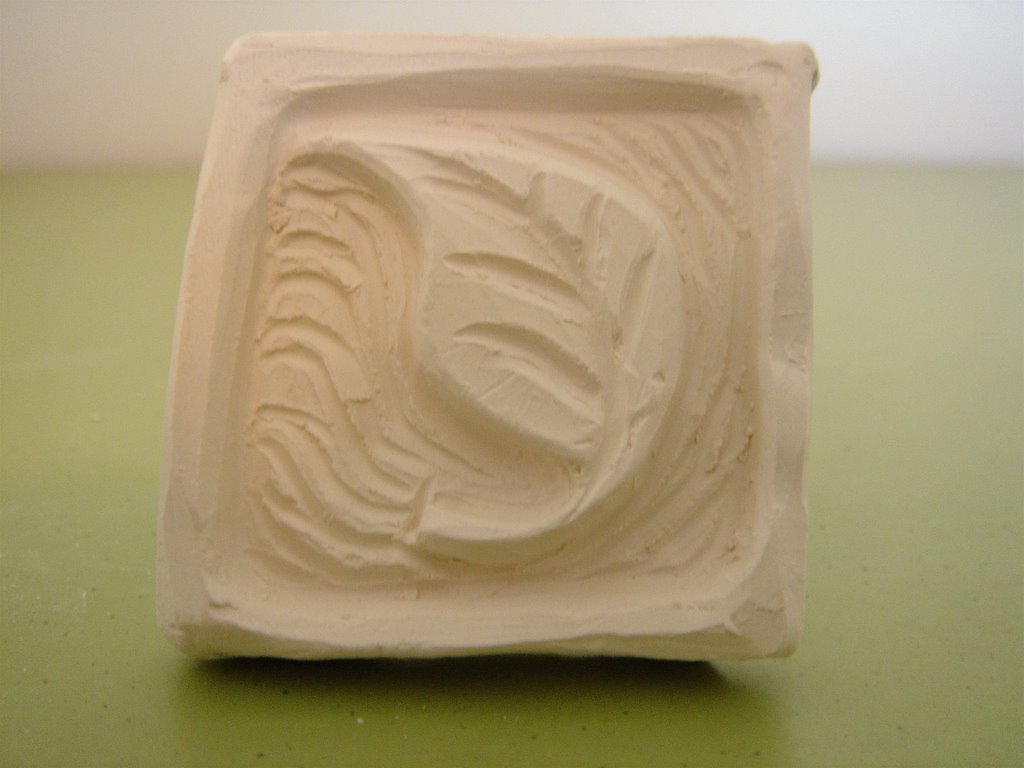
Flat stamps are similar in form to rubber crafting stamps. However, instead of creating a simple space/negative space two-toned image, flat bisque stamps go so much further. They can create depth and texture on the clay to make a truly three-dimensional image.

1. Roll out a ¼ inch thick slab, keeping the thickness even throughout.

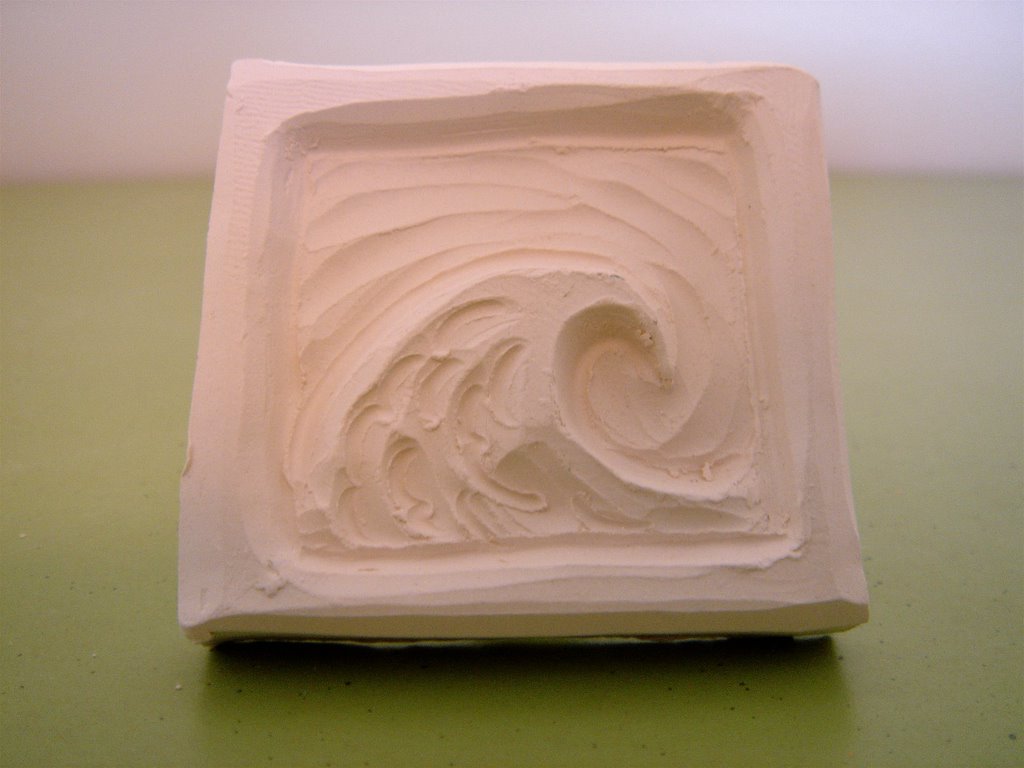
2. Cut the stamp shape from the slab using an exacto knife or a needle tool. Stamps may be any size or shape (within reason). When designing the outer shape of the stamp, simpler is better for cutting out and cleaning up. To save myself trouble when making a very complex stamp, I will surround it by a simple square or round border. As in the stamp pictured below, the wave shape would be hard to cut out an brittle at the edge. By giving it a square border, the stamp is more stable and even the negative space can be used as a design element.


3. From the same slab, cut out a rectangular piece to use as a handle for the stamp. The size of your handle will vary with proportion to the stamp. Score and slip the bottom edge of the handle as well as the contact point on the back of the stamp. Firmly press the handle onto the stamp, wiggling it a little to assure that it sticks. At this point, I like to grasp the handle with my thumb and forefinger on the front and back and press slightly, leaving an indentation. This makes the stamp more comfortable for me to hold when bisqued.


4. Lightly drape the stamp with plastic and allow to dry to medium leather hard.

5. When leather hard, clean up the back of the stamp. Run the eraser end of a pencil along the edges where the handle is attached. This serves to both strengthen the bond, and get rid of messy and sharp edges.

6. With a dull pencil or a needle tool, sketch the stamp’s details on the front. Using carving tools of your choice, carve and texture the stamp. The more texture included at this stage, the more interesting the indentation will be. As in the leaf stamp below, the background is also carved to create interest.


7. When the detailing is finished, allow the stamp to harden further to stiff leather hard. With a damp paintbrush or sponge, lightly brush all surfaces to eliminate sharp edges and give your stamp a finished look. Try to resist the overwhelming urge to test your stamp at this stage. I have broken stamps and destroyed carving in my eagerness to see what the finished product will do.

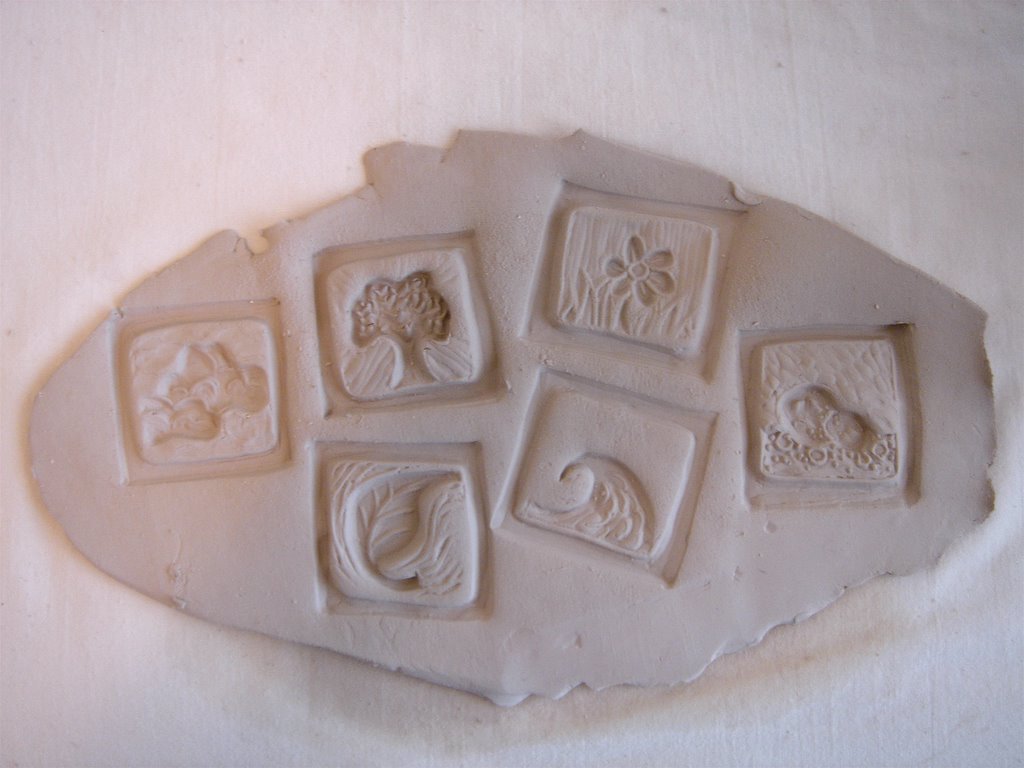
8. Bisque fire the stamp. All stamps shown are bisqued to cone 06 in an electric kiln. Below are some examples of indentations made by finished stamps.


Friday, December 09, 2005


Bisque Stamps


Creating and using bisque stamps is a unique way to make personalized impressions on ceramic ware.


Roller Bisque Stamps

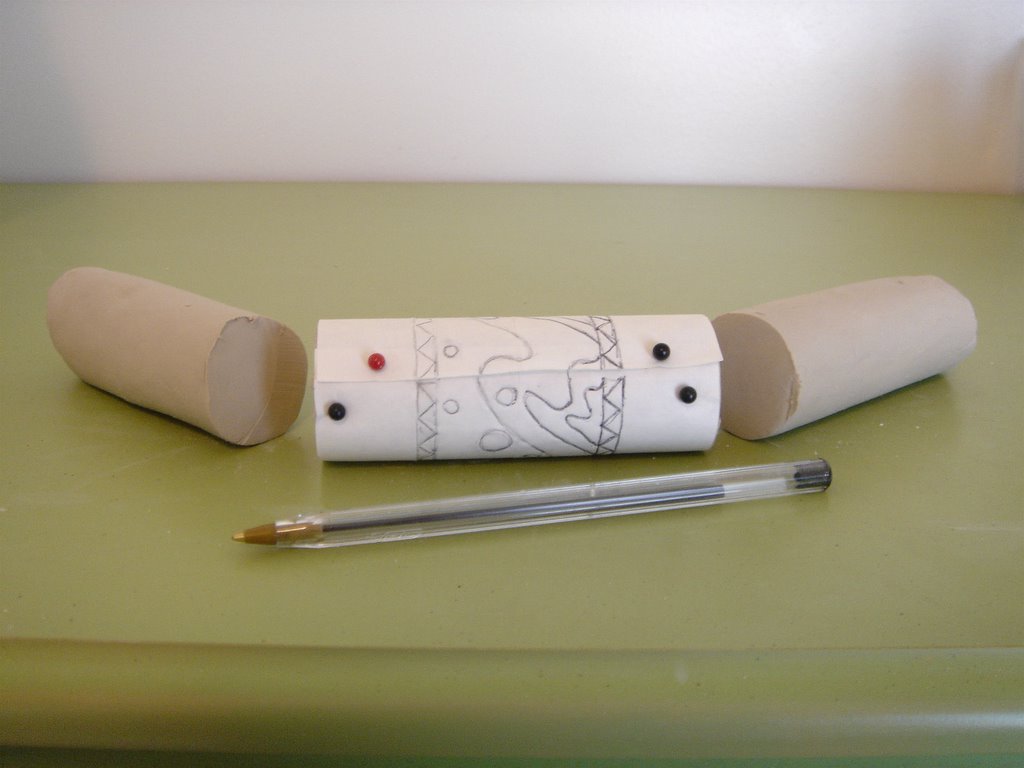
1. Draw a design for the stamp on a piece of white computer paper, taking care that the end points on each side match up. When the paper is rolled up so that the ends meet, the drawing should create a continuous design. To help the ends meet exactly, I will often fold the paper into quarters lengthwise and use the half or quarter marks as starting and ending points. Below is an example of a roller stamp pattern.


2. Roll out an even, thick coil of clay, making sure that it is thick long enough to fit the pattern. Wrap the pattern around the coil, using pushpins to fasten it in place. With a wire tool, trim off the excess clay at each end. With a pen or a very dull pencil, trace your pattern. The impression from the tracing will serve as an outline for carving.


3. Using the traced outline, carve out the stamp. Many different tools may be used. I personally prefer a sharpened paintbrush end, a broken hack-saw blade, and two very old Kemper wire carving tools given to me by a friend. Keep in mind that the carved stamp will become the negative of the actual impression made in the clay. Where the stamp is carved inward is where the impression will be raised up.

4. Several smaller, less detailed stamps can be made by slicing the extra coil into round peices and then texturing the outer rims. I like to put random marks and carvings in these smaller stamps. In combination with larger stamps, they make excellent borders.


5. When the stamps are finished, allow them to dry to leather hard. Gently remove the clay from the center of the stamp to create a hollow cylinder. It is important not to leave the stamp too thick, making an explosion in your kiln, or too thin, creating a weak and brittle stamp.

6. Bisque fire the stamps. All the stamps shown are bisqued to cone 06.
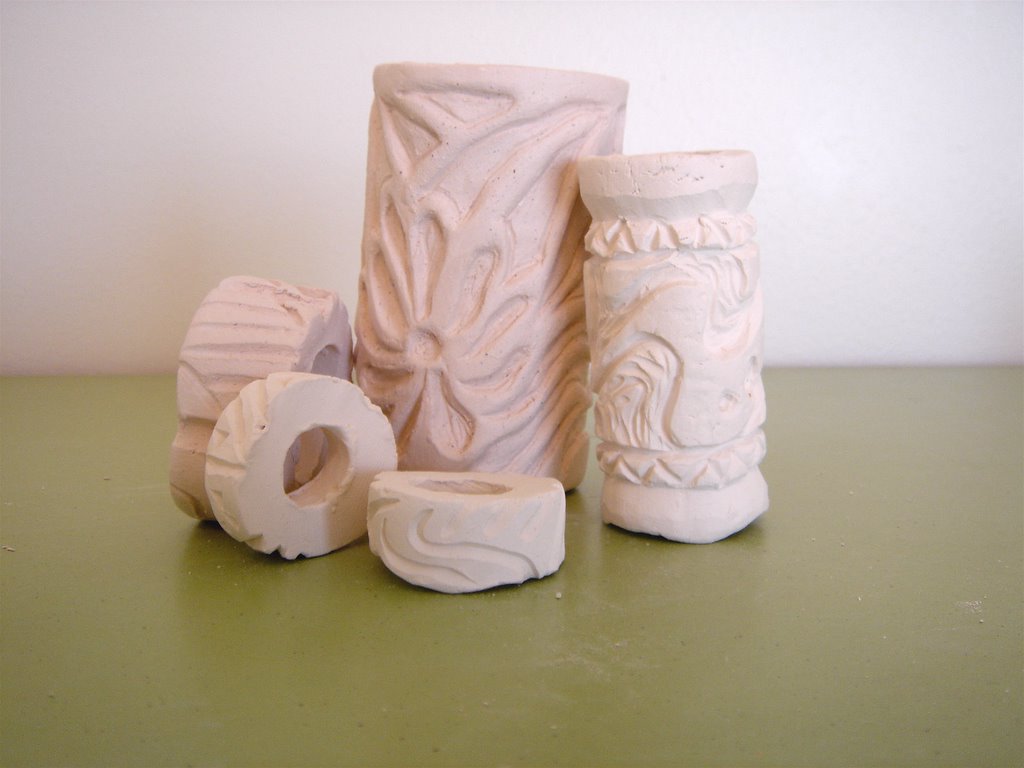
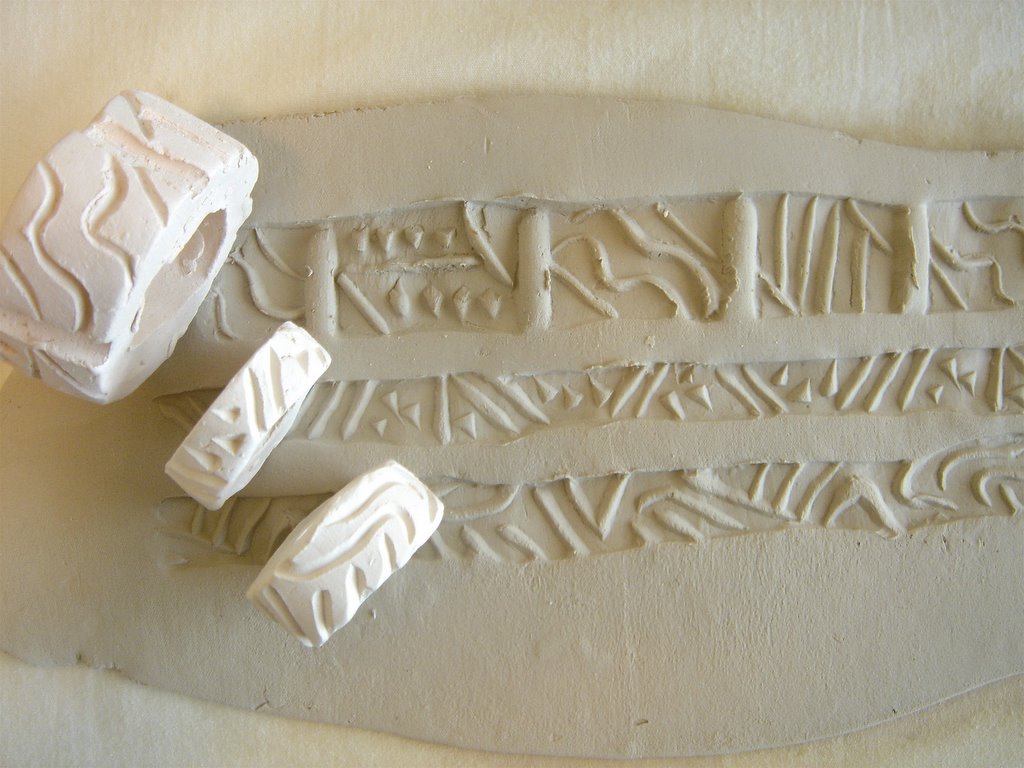
Below is the finished bisque stamp and what it looks like when rolled on a slab of clay.


A great informational article on how to make skinny roller bisque stamps can be found on the web at:
How to Make Ceramic Roller Stamps by Suzi Rhae
http://calstaging.bemidjistate.edu/en3930/rhae/howto.html


Sunday, December 04, 2005

Introduction: Balancing Act

I took a wheel-throwing class my first year in college and quickly became very addicted to ceramics. I continued to take whatever classes in clay that I could until my graduation (BS in Elementary Education) last spring. In the meantime, I developed a small ceramics lab in my garage. With a cone 10 Skutt kiln, a Creative Industries wheel, lots of shelving, and raw glazing materials, I had the capability of doing independent work.


Just two months after graduation, my husband and I had our first child. I made the decision to be a stay at home mother. Whoever says that staying at home is easy should try it out for a 24-hour period with a newborn. The first three months were especially difficult. My daughter ate every two hours around the clock, often taking an hour to finish a meal. The remaining time was divided between changing diapers, rocking her to sleep, bathing her, and (time permitting) such non-essentials as brushing my teeth, taking a shower, putting on makeup, and catching up on sleep.


At five months, my daughter is finally to a point where she has a regular schedule. She sleeps at night (most of the time) without interruption. During the day, she takes a nap or two and is beginning to entertain herself between naps; giving me much needed free time. I have consistent chunks of time with which to work on my craft.

I schedule my time to work several hours a week on experimenting and building with clay. The goal is to create a coherent series of pots that make use of my talents and interests in handbuilding with puki bases, carving, sculpture, and using bisque stamps.

A favorite college ceramics instructor used to say that ceramics is the friendliest of all arts. The potter or sculptor will rarely ever guard jealously a technique or recipe because they know that even should another artist try the same thing in the same way, they would never get the same results. The very nature of the medium breeds spontaneity. As I work to develop my art, I will be completely open in sharing techniques, ideas, recipes, and results in the hopes of receiving feedback and even better ideas to add to my style.


Through this blog, I am hoping to meet others like myself; committed mothers who carve out chunks of their busy schedule to express themselves artistically through clay, as well as committed clay artists of all walks of life who share common interests.